Search Endpoints - Advanced
In this window, you can view all endpoints that have been claimed to the site and perform a more focused search to find specific endpoints that match the criteria for your groups within the Neptune® 360™ system.

What You Can See and Do in This Window
Click a link to display the related information or step-by-step procedure. Note that you may have access only to certain functions based on your role.
Search and Sort Endpoints
By default, all endpoints that have been claimed to the Site are displayed in the right panel.
- On the Neptune 360 navigation panel, select Search Endpoints under Groups.
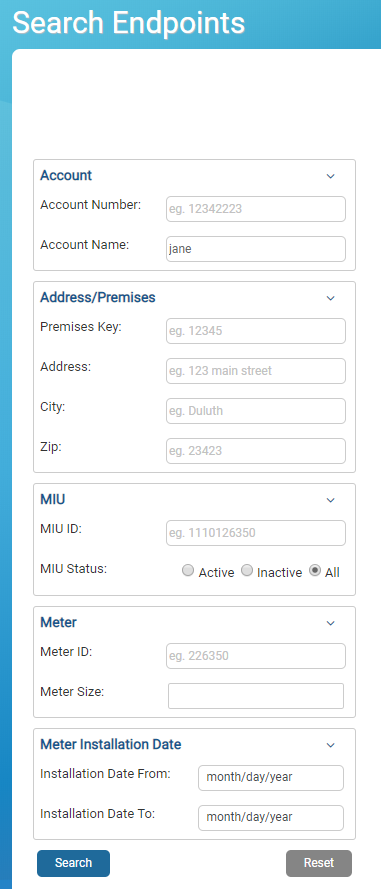
- On the left panel, enter values for one or multiple criteria to refine the list of endpoints, and then click Search.
- Account details:
- Account Name.
- Account Number.
- Address details:
- Address.
- City - only use if provided separately in import file.
- Zip - only use if provided separately in import file.
- Endpoint (MIU) details:
- Endpoint (MIU) ID.
- Endpoint (MIU) Status (Active, Inactive, All).
- Meter details:
- Meter Number.
- Meter Size - select from standard options (in inches). You can select multiple sizes to search at one time.
- Meter Install Date – date range within which the meter was installed on the premises.
- Group / Route – group or route in which the endpoint is categorized.
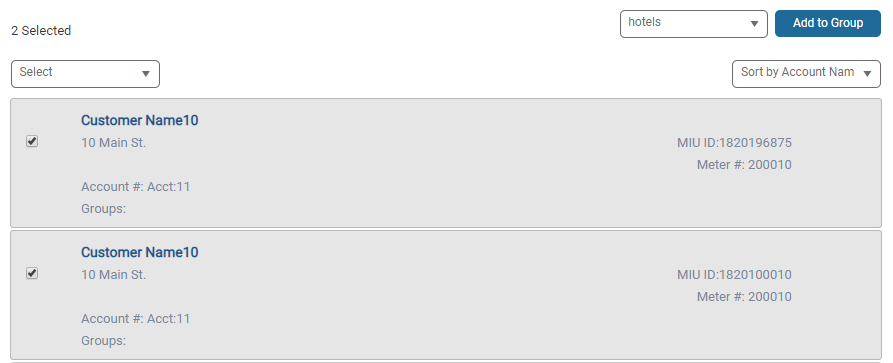
- You can sort by the details defined for the endpoints. Click the arrow in the Sort By field, and then select an option:
- Account name.
- Account number.
- Address.
- Endpoint (MIU) ID.
- Meter Number.
- Meter Size.
Account Name is the default and all options sort in ascending order. The endpoints display in ascending order and you can navigate through the list pages.
Add an Endpoint to a Group
After you search for endpoints, you can add them to your groups.
- On the Neptune 360 navigation panel, select Search Endpoints under Groups.
- On the right panel click the endpoints you want to add to your group. You can select individual endpoints, all endpoints in the search results, or all endpoints on a page.
- In the Select Group field, select the group to which you want to add the selected endpoints, and then click Add to Group.
- In the confirmation box, click Add to add the endpoints.
The selections are retained so that if desired, you can add the same selections to multiple groups with minimal effort.
- To clear selections, click Multi Select and Deselect All. Or you can click Reset.
The Reset button clears all endpoint selections. It also clears the search criteria and returns the page to its default state of listing all endpoints claimed to the Site.
