Handhelds
In this window, you can view, set up, and manage handheld devices within your system. Working with handhelds in Neptune® 360™ requires that you have permission to set up handhelds for your utility.
You can view the handheld devices that are added to your utility and which users are assigned to specific devices. The handheld devices that Neptune 360 supports are:
- Trimble® Nomad® 1050.
- Trimble® Ranger™ 3 series.
If you do not yet have handhelds connected to your system, see Connect Handhelds to your Computer for the procedure.
Handheld Requirements
This section defines the handheld operating system and software requirements.
Handheld Operating System Requirements
The Trimble handhelds require the Windows Mobile 6.0 (or higher version) Professional operating system.
Handheld Software Requirements
Your handhelds need either an existing N_SIGHT™ R900® CAB version installed or the latest meter reading application CAB![]() Cabinet File. An archive-file format for Microsoft Windows that supports data compression and embedded digital certificates used for maintaining archive integrity. Full data integrity is maintained during compression. file. Email Customer Support at support@neptunetg.com for access to the latest CAB file to install on any handhelds that have no meter reading application installed.
Cabinet File. An archive-file format for Microsoft Windows that supports data compression and embedded digital certificates used for maintaining archive integrity. Full data integrity is maintained during compression. file. Email Customer Support at support@neptunetg.com for access to the latest CAB file to install on any handhelds that have no meter reading application installed.
For handhelds with an existing N_SIGHT R900 CAB version installed, you can upgrade to the latest meter reading application by enabling the Automatic Updates option explained in Create or Edit a Handheld.

What You Can See and Do in This Window
Click a link to display the related information or step-by-step procedure. Note that you may have access only to certain functions based on your role.
| – | |
| – | |
| – |
View Handhelds
When you access the Handhelds window, a list of handhelds displays in the left panel, and each handheld has a unique name that you assign as the Handheld ID when you create the handheld in your system.
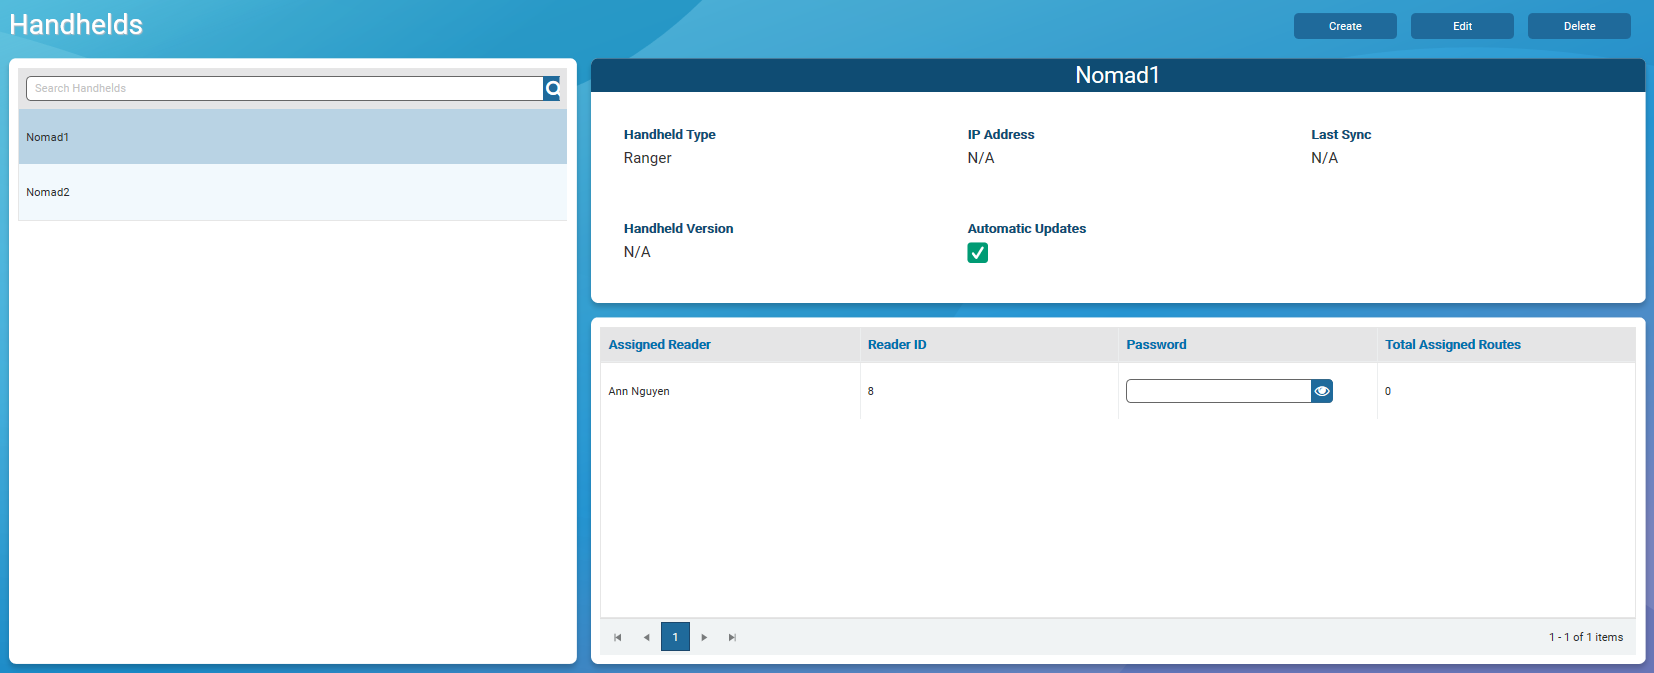
Details for the selected handheld appear in the right panel and include:
- Handheld Type – brand of handheld.
- IP Address – IP address for the handheld. This field displays N/A until the handheld successfully syncs with Neptune 360.
- Last Sync – date and time the handheld last synced to the Neptune 360.
- Handheld Version – version number for the meter reading application on the handheld.
- Automatic Updates – if enabled, whenever there is a new version of the meter reading application available, the handheld automatically updates the application on the handheld when it syncs with Neptune 360 (via Neptune 360 Sync). Neptune 360 Sync facilitates the exchange of route and reading information between your handhelds and Neptune 360.

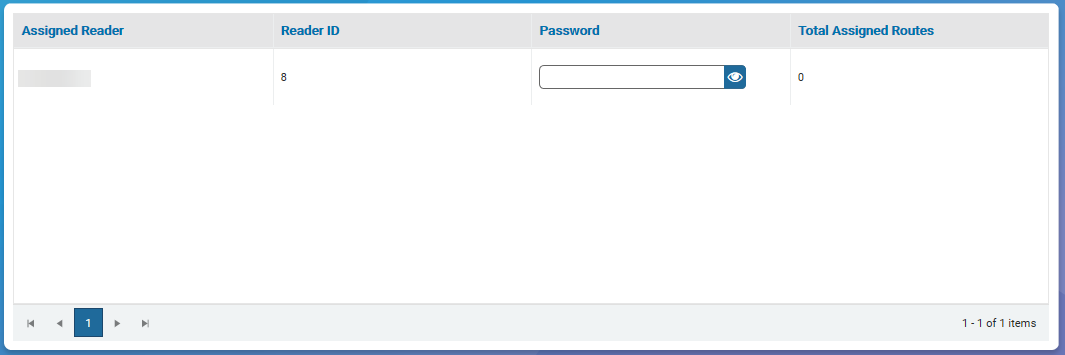
The bottom right panel shows Readers assigned to the specific handheld and the number of routes assigned to each reader. Each Assigned Reader page contains a maximum of 10 readers and you have grid navigation options so you can sort and refine the list of readers.
- Assigned Reader – user assigned to the handheld.
- Reader ID – ID of the user, which can be used when logging into the meter reading application on the handheld.
- Password – password needed to log into the meter reading application on the handheld. If it is blank, there is no password for the user. Click
 to reveal the password, if one is assigned to the user.
 - Total Assigned Routes – number of routes assigned to the reader. You assign route assignments in the Route Assignments window.
Search Handhelds
You can search for a specific handheld by the assigned ID. You define the ID when you create a handheld in the system.
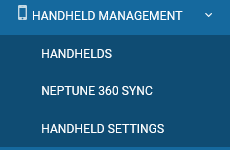
- On the Neptune 360 navigation panel, select Handhelds under Handheld Management.
- In the Search Handhelds field, type the first few characters of the ID.
- Click
 to display the handhelds that match your search parameters.
 - Click the handheld to display the details in the top right section of the window, and the assigned reader and routes are displayed in the bottom right section of the window. See View Handhelds for descriptions of the handheld details.
Create or Edit a Handheld
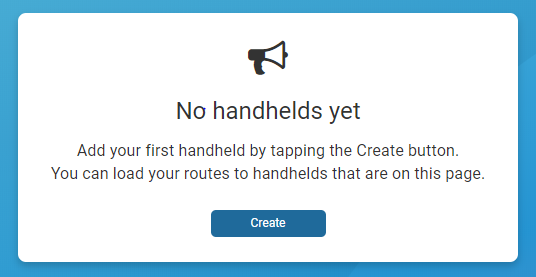
You must add your owned handhelds to sync the meter reading data with Neptune 360. If you have not added handhelds, Neptune 360 displays the following message:
- On the Neptune 360 navigation panel, select Handhelds under Handheld Management.
- Do one of the following. To:
- Add a handheld to the system click Create,
- Edit the details for an existing handheld, select the handheld to edit, and then click Edit.
The system displays the Handheld Configuration window.
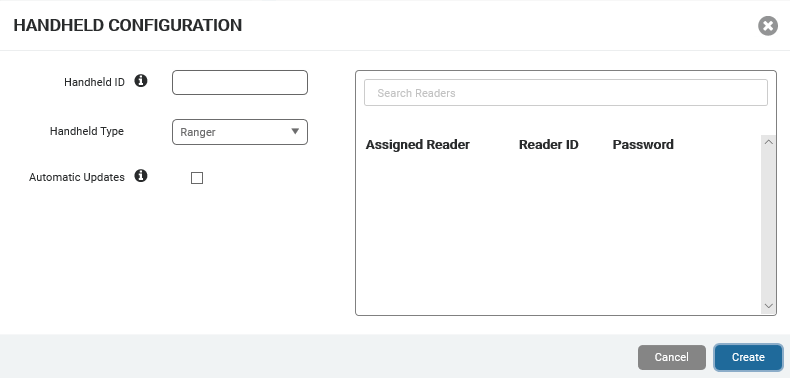
- In the Handheld ID field, type the ID for the handheld as it appears on the main menu of the meter reading application of the handheld.
- In the Handheld Type field, select the type of handheld you are adding.
- Select Automatic Updates if you want the handheld to automatically update its meter reading software when it syncs with
Neptune 360.The handheld syncs through Neptune 360 Sync, if there is a new version of the meter reading application available. Neptune 360 Sync facilitates the exchange of route and reading information between your handhelds and Neptune 360. - In the Search Readers field, begin typing a name to display available users not currently assigned to a handheld, and then click a name to assign the user. You must assign at least one reader to a handheld and you can assign a reader to only one handheld at a time. However, any user can log into any handheld.
When you add a user, Neptune 360 assigns a reader ID to that user and the ID cannot be changed. The user must log into the meter reading application on the handheld using this ID.
- You can create a password. By default, passwords are left blank and are not required.
Delete a Handheld
Deleting a handheld removes it from Neptune 360. If you delete a handheld in error, you can create it in the system again.
- On the Neptune 360 navigation panel, select Handhelds under Handheld Management.
- If the handheld does not display in the left panel, then in the Search Handhelds field, type the first few characters of the ID to display matching handhelds.
- Select the handheld you want to delete, and then click Delete.
- In the confirmation dialog box, click Delete.
Unassign a Reader
You can unassign a reader from a handheld, if there are multiple readers assigned. However, a handheld must have at least one reader assigned.
- On the Neptune 360 navigation panel, select Handhelds under Handheld Management.
- In the left panel, select the handheld from which you want to unassign the reader.
- Click Edit to display the Handheld Configuration dialog box.
- Click
 next to the reader you want to unassign, and then click Save.
