Handheld Settings

The handheld settings define the device level preferences and the read method for various read type / meter type combinations. The settings apply to all handhelds that sync with Neptune® 360™ through Neptune 360 Sync.

Image shows the Handheld Settings page with the Reboot Time Settings displayed

It is recommended that you set your meter and read types before using Neptune 360 Sync.


Up arrow - go to top of topic


What You Can See and Do in This Window

Click a link to display the related information or step-by-step procedure. Note that you may have access only to certain functions based on your role.


Up arrow - go to top of topic


View the Handheld Settings

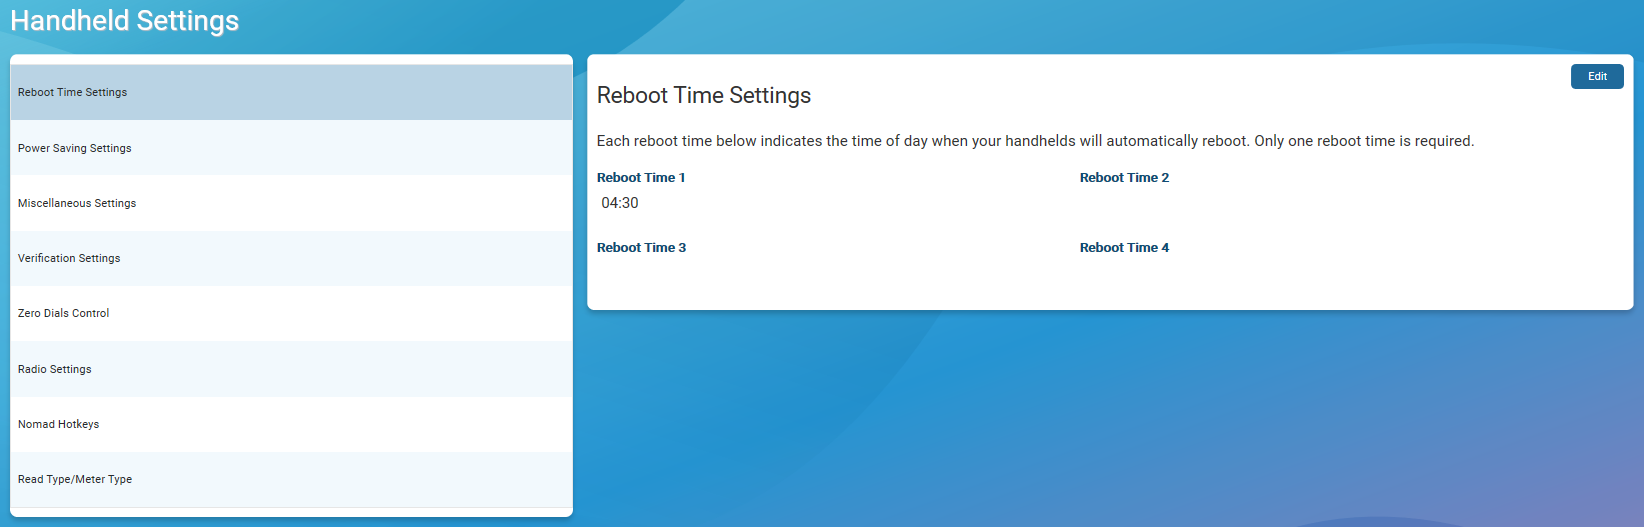
A list of settings displays in the left panel of the Handheld Settings window and the details for the selected setting appear in the right panel.

The following table defines the settings you can edit.

Handheld Settings Descriptions
Setting Description
Reboot Time

Settings that control when the handhelds reboot. You can set the handhelds to reboot up to four times within a 24-hour period and the default is 4:30 A.M. The times display in 24-hour time format and you must set at least one reboot time.

Power Saving

The number of seconds a handheld remains active while out of the cradle before the handheld powers off.

Miscellaneous

Settings that control the functionality of the handhelds:

  • Administrator Password – password used on the handhelds to allow certain functions such as a reset. The default is bubba.
  • Default Dial Prompt – changes the manually-read accounts display before a reading is entered. For example, an asterisk (*) in this field displays manual readings on the handheld as ***** before a reading is entered.
  • Hold Route Default – indicates which types of accounts by default should remain on the handheld after unloading routes from a handheld. The options are:
    • None – all accounts (read, unread, and skipped) are unloaded.
    • Unread-Skipped – only read accounts are unloaded.
    • Unread – only read and skipped accounts are unloaded.
  • Allow Dial Decimal Change – indicates whether to allow a reader using a handheld to change the number of dials or decimals for the account.
  • Backup Idle Time indicates (in seconds) – indicates how many inactive seconds to wait after the Backup Interval time before performing the handheld database backup. The default is 20 seconds.
  • Backup Interval (in minutes) – indicates how often the handheld backs up the database while logged into a route. The default is 30 seconds.
  • Type of GPS – indicates the type of GPS system used. Selections are:
    • EXTERNAL.
    • SiRF.
    • TYCO.
  • Allow Re-Work – indicates whether a reader using a handheld can edit a previously-entered order. If checked, the Re-work menu item appears under the Meters menu item.
  • Search Drop Downs by 1st Characters Only – indicates whether to search the selections by the first letter of an item on the handheld. If this is disabled, handhelds search only when continuously keying all letters to find specific words in the selection list.
Verification

Settings that control the high-low audit process on your handhelds:

  • Digits to Verify Meter – indicates the number of digits required to verify a meter number on your handhelds. For example, if this is set to four and a reader fails the high-low audit, the reader is prompted to enter the last four digits of the meter number to continue reading. Zero is the default which means this option is not used.
  • Verify Without Reentry – indicates whether to require your readers to verify a high-low fail audit by entering the reading again. If this is disabled, readers must manually key the reading again.
  • Probe Validation – determines how readings with a probe device are handled if they fail the high-low audit. Options are:
    • Verify Hi/Lo, Move On – moves on to the next incomplete account.
    • Alarm, Stay at Meter – a beep sounds, and the handheld remains on the account.
    • Force Reentry – a message appears, and the reader is required to read the meter again using the probe.
    • Force Notification on Invalid Probe Read – Yes or No
Zero Dials Controls

Settings that control the reading process when the number of dials for a meter is set to zero. Your handhelds use the number set in the Default Manual Dials field if the If Dials = 0 field is set to Use Digits Entered.

  • If Dials = 0 – indicates what action to take on the handheld if the number of dials is set to zero or it is blank. The options are:
    • Ask Meter Reader – the Read Parameters window displays on the handheld, prompting the meter reader to enter a value for the dials.
    • Use Digits Entered – when this option is selected the handheld uses the number of dials from the Default Manual Dials field.
  • Default Manual Dials – the number of manual dials on the handhelds for which the meter reader can enter values.
Radio

Settings that define how the handhelds function during timeouts and pauses:

  • Radio Scan Pause – indicates the time for the radio to pause between scans. The default is 1000 seconds.
  • R900 Receiver Timeout – indicates the amount of time between R900® receiver timeouts. The default is 2000 seconds.
  • Enable Keep Alive – indicates whether handhelds continuously pick up radio reads until the handhelds power off. The default is No.
Nomad Hotkeys

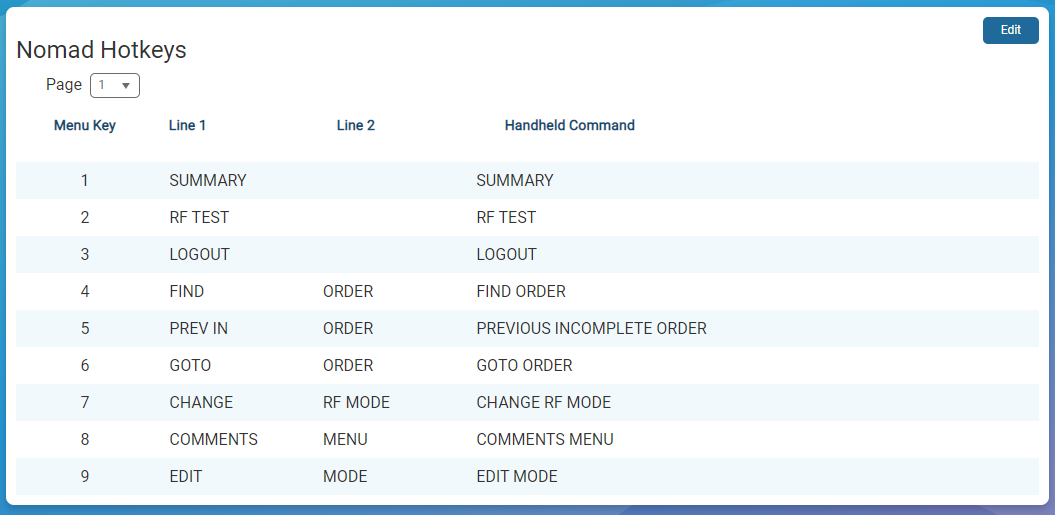
Settings that specify the hotkeys used on the route reading menu of your Nomad® handhelds. You can create up to two pages of hotkey definitions.

  • Line 1– label for the hotkey or handheld command. Each command requires at least one label.
  • Line 2 – second label for the hotkey or handheld command. This label is optional.


Up arrow - go to top of topic


Edit the Handheld Settings

  1. Select the group for the settings you want to edit.

The settings appear in the right panel. The following image shows the Nomad Hotkeys settings.

Image shows the Nomad Hotkeys page on which you can define hotkeys for the handheld

  1. Click Edit to enable the settings fields.
  2. Enter and select the desired settings in each field.
  3. To delete a setting where applicable, click Delete next to the setting you want to remove.
  4. Click Set in each field as required to set the individual settings within the overall group.
  5. Click Save to save the settings.
Important! Log out then log back into Neptune 360 Sync after making any changes to your handheld settings or read type / meter types.


Up arrow - go to top of topic


Neptune logo indicates the end of the Help topic