Alert Notifications
You can view the events and corresponding alerts for your utility and define the thresholds for each event. The system sends permissioned users an alert when the equipment meets the threshold for a particular event. The thresholds you define are the minimum number of days within a range of days during which an event occurs that triggers an alert.
You can add and edit alerts, add groups to and remove groups from an alert, and select notifications for subscribers. Subscribers can receive alert notifications by email, by an Action Center notification, or both, depending on the subscriber options you select. Alert emails include a link to the current KPI report showing endpoints that exceeded the threshold. The Group by Events email also has a link to display the account and the day of the alert in the Customer Inquiry page.
The events for which you define the thresholds are:
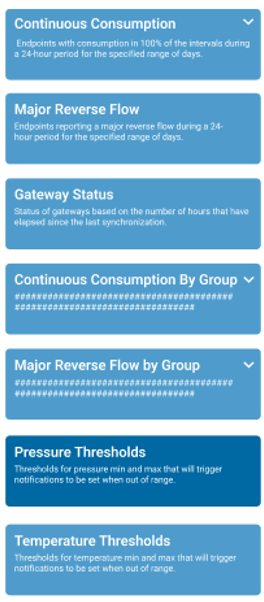
- Continuous Consumption (Critical, Warning, Minimal thresholds) – endpoints recorded as having continuous consumption at each 15-minute interval reading over a 24-hour period.
- Major Reverse Flow – endpoints recorded as having a major reverse flow over the past 24-hour period within the specified range of days.
- Gateway Status – status of gateways based on the time elapsed since the last synchronization.
- Continuous Consumption by Group – endpoints within a specified Group with consumption in 100% of each 15-minute interval during a 24-hour period.
- Major Reverse Flow by Group – endpoints within a specified Group reporting a major reverse flow.
- Pressure thresholds (and by Group)– minimum and maximum threshold for water pressure. The minimum threshold is 20 PSI (137.89 kPa) and the maximum threshold is 175 PSI (1,206.58 kPa).
- Temperature thresholds (and by Group) – minimum and maximum threshold for water temperature. The minimum temperature is +32.9F (0.5C) and the maximum temperature is +141F (+60.5C)

MACH 10 Alert Guidelines
It is recommended that if you want to receive pressure or temperature notifications for MACH 10 meters with this capability, set up a group specifically for these meters. Adding these meters to a group only for these types of notifications ensures that the notifications are specific to MACH 10 meters with temperature and pressure capability, and excludes MACH 10 meters that do not have the capability, and excludes other types of meters. You can set up multiple groups for your MACH 10 meters and set different thresholds based on the location of the meters.
In addition to being pressure and temperature capable, the MACH 10 meters for which you want to set up alerts for those conditions must be connected to endpoints that operate on the Verizon (U.S.) or FirstNet (Canada) cellular networks. See Add or Remove a Group for the specific procedure steps to manage groups.
Note that following additional guidelines apply to temperature and pressure capable MACH 10 meters:
- You can include a meter in multiple groups. Be aware that having meters in multiple groups may increase the level of alert management.
- A group threshold alert for a meter does not override any other alert in place for that meter. For example, if you have a MACH 10 meter with a minimum pressure threshold of 20 PSI and the same meter is in a group with a pressure threshold of 18 PSI, you receive an alert when the meter reaches 20 PSI and when the meter reaches 18 PSI.
- The freeze warning alert also does not override any other alert in place. You receive an alert for when the temperature reaches 32.9°F (0.5°C) and when the meter meets the temperature condition criteria defined for any additional alerts in place.
You can create separate groups for other types of meters, such as MACH 10 meters that exclude temperature and pressure capability, and set up separate alerts for those meters.
What You Can See and Do in This Window
Click a link to display the related information or step-by-step procedure. Note that you may have access only to certain functions based on your role.
| – | |
|
– |
|
| – | |
| – | |
| – | |
| – |
Display by Group Alert Details
You can display the details for events that are by group, which are Continuous Consumption by Group, Major Reverse Flow by Group, and Pressure and Temperature Thresholds – Groups.
- Click
 on the page header to display the menu, and then select Alerts Notifications.
 - On the left panel, click an alert or click and expand an alert group.
- Click an alert in the list.
The Manage Alerts panel shows:
- Alert name.
- Minimum and maximum thresholds, if applicable
- Groups included on the alert, including group name and a list of meters in the group.
- List of active users / subscribers for the site ID (name and email address).
- Email check box – indicates alert notification enabled for the user to receive by email.
- Action Center check box – indicates alert notification enabled for the user to receive by the Action Center.
Edit an Alert without a Threshold
For Continuous Consumption and Gateway Status, you can set the thresholds for the three levels:
- Normal.
- Warning.
- Critical.
Major Reverse flow is always a critical condition and is predefined to trigger an alert after 1 day. Pressure and temperature alerts include thresholds that you can edit.
See Email Notifications to view or update the verbiage displayed in the alert email. The email notification users receive include links to each affected endpoint.
For alerts that are by group, you can edit the group, add an alert, or delete an alert.
- On the Alerts Notifications page, on the left panel, click the alert you want to edit.
- If you are editing a Continuous Consumption alert or an alert with groups, click the down arrow, and then click the alert or the group you want to edit.
- Click Edit to enable the fields.
- Select or enter the number of days or hours as the criteria that triggers the alert for the condition, if applicable.
- If you are editing an alert with a group, update the name, as desired.
- Add and remove groups, if applicable.
- Add and update subscribers, as desired.
- Click Save to save your edits.
Edit an Alert with a Threshold
You can edit an alert that has thresholds, which are the pressure and temperature thresholds for MACH 10 meters. In addition, for alerts that are by group, you can edit the group, add an alert, or delete an alert.
- On the Alerts Notifications page, on the left panel, click the alert you want to edit.
- If you are editing a an alert with groups, click the down arrow, and then click the alert you want to edit.
- Click Edit to enable the fields.
- Select or type new minimum and maximum pressure or temperature thresholds, if applicable.
- If you want to reset the alert to the original settings, click Default, if applicable.
- In the Threshold Name field, type a new threshold name, if applicable.
- In the Group Name field, select a new group to add to the alert, if applicable.
- Add and update subscribers, as desired.
- Click Save to save your edits.
Edit an Alert Group
You can edit the name of an alert, add and remove groups, select notification methods for subscribers, and link to Group Management.
- On the Alerts Notifications page, on the left panel, click an alert or click and expand an alert group and then click the alert you want to edit.
- Click Edit to enable the fields.
- In the field that displays the name, type a new group name, if desired.
- If you want to view group details on the Group Management page, click
 next to the group name.
 - Click Save to save the edits.
Add or Remove a Group
You can add a group to an alert that does not have threshold settings. For alerts with threshold settings, you can only select a different group.
- On the Alerts Notifications page, on the left panel, click the alert grouping to which you want to add a group.
- Click Edit to enable the fields.
- To add a group, click
 Add Group.
 - Click
 in the Select field to select the group to add.
 - If you want to remove a group from the alert, click
 next to the group name.
 - Click Save to save the group addition or removal.
Select Alert Notifications
You can send an alert notification by email or by an Action Center notification to any subscriber of the alert. If the alert applies to a group of endpoints, all impacted accounts are listed in the Action Center alert.
The first person on the subscribers list is always the current user. Next in the list are any users already subscribed to the alert in alphabetic order, and third in the list are all unsubscribed users in alphabetic order.
If you do not have permissions to add, edit, or delete alerts then you will only see your user in the list and the edit will only allow you to subscribe or unsubscribe your user.
- On the Alerts Notifications page, on the left panel, click an alert or click and expand and alert group and then click the alert you want to edit.
- Click Edit to enable the fields.
- In the Subscribers grid, click the check box below the icon (email and Action Center) for each subscriber you want to receive an alert. You can select the check box for both icons.
- Click Save to save the alert notifications.
Add or Edit Subscribers
You can add subscribers to any alert and search for subscribers that you do not see on the grid. The grid displays the name of each user in your utility network, the user email, and check boxes selected to indicate the alerts (email or Action Center) a user receives as a subscriber.
- On the Alerts Notifications page, on the left panel, click an alert or click and expand and alert group and then click the alert you want to edit.
- Click Edit to enable the fields.
- If you do not see the user you want to add already in the subscriber grid, then in the search field, enter the user name.
- In the appropriate column, click the check box to enable an email alert for the subscriber, an Action Center alert, or both.
You can deselect one or both check boxes to disable the alerts for a subscriber.
- If you want to update the alert options for other subscribers, repeat step 4 for each subscriber.
- Click Save to add the subscribers.
Add or Edit an Alert
You can add and edit alert configurations. When you add an alert by group, you must add at least one group to the alert. You cannot remove a group from an alert, you can only change the group.
- On the Alerts Notifications page, on the left panel, click an alert event or click and expand an alert group where you want to add an alert.
- Click Add Alert.
- If the alert has thresholds, select or type the minimum and maximum threshold values.
- In the Threshold Name or Enter Alert Name field, type a name for the alert.
- In the Group Name field, select a group to add to the alert, if applicable.
Note the Meters in Group grid that shows each meter name, account number, and endpoint ID.
- To view the group details, click
 next to the group to display the details on a separate Groups Management page.
 - To add a group, click Add Group, if applicable.
- Add subscribers and update the subscriber notifications as desired.
- Click Save to save the new alert.

Set a MACH 10® Condition Notification
You can set notifications for your MACH 10 meter whenever there are freeze warning conditions or empty pipe (no water) conditions present. The freeze warning notification is based on the preset threshold of 32.9° F (0.5°C). Neptune 360 sends an alert notification when the meter reaches the threshold and when the meter is outside of the threshold condition.
- On the Alerts Notifications page, on the left panel, click the MACH 10 Flags event.
- In the Manage Alerts panel, click Edit to enable the fields.
- Click the check boxes for Freeze Warning and Empty Pipe as desired, to set the alert notifications for these conditions.
You can set notifications for one or both conditions.
- Add subscribers as required so that all users on the subscriber list receive the condition notifications.
Delete an Alert
- On the Alerts Notifications page, on the left panel, click the alert you want to delete.
- Click Delete.
- In the confirmation dialog box, click Yes.
